If you’re reading this, chances are you’re either a contractor tired of backbreaking manual plastering, a small construction business owner looking to scale without hiring extra labor, or someone who’s never even heard of a mortar pump but is curious what all the hype is about. As a mortar pump supplier, I get tons of questions every day: Is it hard to use? Will it save me money? What do I actually need to do to get good results? I’m not here to sell you something you don’t need— I’m here to break this down like I would to a colleague grabbing a coffee on a job site. Let’s dive in, no jargon, no fluff, just real stuff that works. Mortar Pump
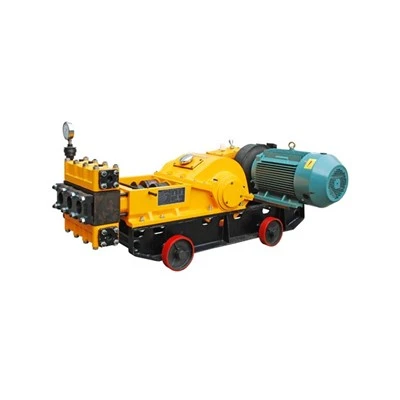
First off, let’s cut to the chase: a mortar pump isn’t some fancy, overly complicated machine only big crews can use. It’s basically a tool that moves wet plaster (or mortar, grout, even thin concrete) from a mixer right to where you need it— walls, ceilings, foundations, whatever— without you hauling buckets back and forth, troweling nonstop, or wasting half your material by drooling it on the ground. I’ve seen guys go from finishing a 100-square-foot wall in a full day to knocking it out in 2 hours with one of these. But here’s the thing: that only happens if you use it right. Mess up a step, and it’ll clog, leak, or spit half the mortar at you. So let’s walk through the process step by step, the way I train all our new customers.
1. Prep Before You Even Hit the “On” Button (This Is 80% of the Battle)
I can’t stress this enough— 9 out of 10 bad mortar pump issues start with bad prep, not the machine itself. Let’s start with the mortar mix. You can’t just dump any old mix into the pump. Too thick, and it’ll jam the hose; too runny, and it’ll sag off the wall. For most residential and light commercial plastering, you want a consistency that’s like thick pancake batter— think the kind that holds its shape when you lift a spoon, but isn’t so stiff it cracks when it’s poured. If you’re mixing it yourself, don’t overwater it just to make it pour easier. A trick I learned from a old mason: if you can drag a trowel through it and it leaves a smooth path without oozing, you’re good. Also, make sure you sift out any lumps or big aggregates before you add it to the pump. Those lumps are the #1 cause of hose clogs. I’ve had guys come back to me swearing their pump is broken, only to find a golf-ball sized rock stuck halfway through the 50-foot hose. Common mistake— just sift your mix, and you’ll skip that headache.
Next, check your setup. The hoses you use matter a lot, too. Don’t use a regular garden hose for this— get a heavy-duty, flexible rubber or polyurethane hose made specifically for mortar pumps. They’re cheaper than replacing a jammed pump, I promise. Also, make sure the hose is laid out as straight as possible. Too many sharp bends, and that mortar has to work harder to move, leading to pressure buildup and clogs. If you have to turn a corner, make it a wide, smooth bend, not a 90-degree kink. Oh, and prime the pump before you start! Prime it with a small amount of water or a thin layer of mortar paste first— this lubricates the inside of the pump chamber and hose, so the first batch of mix slides through easily. Skipping priming is another top mistake; trust me, I’ve seen a brand new pump’s first load of mortar seize up because it didn’t get a lubrication pass.
2. Operating the Pump: Simple, But Don’t Rush It
Okay, so everything’s prepped— mix is right, hoses are laid, pump is primed. Now what? Let’s keep this simple: start slow. Don’t crank the throttle or turn the power all the way up right away. Most mortar pumps have a variable speed control for a reason— adjust it so the mortar comes out of the nozzle in a steady, even stream, not a splatter. If it’s coming out too fast, you’ll over-apply the plaster, which will sag or crack later. Too slow, and you’re wasting time waiting for it to build up on the wall. Aim for a stream that’s about as wide as your trowel.
When you’re applying it, hold the nozzle about 6 to 12 inches away from the surface, at a 45-degree angle. Don’t hold it too close— that’ll blow mortar everywhere, and too far, and the pressure will make it bounce off the wall. Move the nozzle smoothly, just like you’d swing a paint roller, overlapping each pass by about 1/3. And here’s a pro tip: don’t try to cover the entire wall in one go. First, lay down a base coat about ½ inch thick, then come back for a second thinner coat once the base is partially set (usually 15-20 minutes, depending on temperature). If you put too much on at once, it’ll drip down the wall before you can trowel it smooth.
Wait, what if you need to pause for a minute? Like, if you have to adjust something on the wall, or take a quick water break? Turn the pump off, but leave a small amount of mortar in the hose. Don’t empty the whole line— if mortar dries inside the hose and pump chamber, you’re gonna have to dismantle the whole thing to unclog it, which is a huge pain. If you’re gonna be gone for longer than 10 minutes, you should flush the hose with water to keep it from drying out, but for quick breaks, a little leftover mortar is fine.
3. Handling Clogs (The Most Common Frustration, And How To Fix It Fast)
Even if you do everything right, you might get a clog. It’s not the end of the world. Panicking is. First, turn the pump off immediately— don’t keep running it, that’ll only make the clog tighter and damage the motor. Then, what you do next depends on where the clog is. If it’s near the nozzle, just unscrew the end and pull the clog out with a pair of pliers. If it’s further down the hose, try reversing the pump for 5 to 10 seconds (most mortar pumps have a reverse function for this) to push the clog back into the pump chamber, where you can easily remove it. If that doesn’t work, you can cut the hose right at the clog, remove the blockage, and reattach the two pieces. Most heavy-duty mortar hoses are easy to splice with a quick coupling, so you won’t have to replace the whole line.
The best way to avoid clogs? Clean the pump and hose right after you’re done for the day. Don’t leave mortar sitting in the pump overnight. Flush the entire system with water, take apart the hose and pump screen (most pumps have a removable screen at the inlet), and wash all the parts with a brush. I’ve seen a $2,000 pump get ruined because a guy left a little mortar in it for a week— that’s a mistake you can avoid in 10 minutes.
4. Pro Tips From the Trenches (Stuff No Manual Tells You)
After years of working with contractors, I’ve picked up a few tricks that make using a mortar pump way easier than the basic guide. Let’s share those. First, if you’re working on a high wall, don’t run the hose straight up 30 feet without a pressure reducer. That extra vertical distance creates a lot of back pressure, which can make the pump work too hard and clog. A small pressure reducer on the top end of the hose will even things out. Second, if you’re using the pump on a job site with extreme heat, add a little extra water to your mix to keep it from drying too fast in the hose. But don’t overdo it— just enough to keep it workable. Third, invest in a pump with a good warranty. Cheaper no-name pumps might save you a few hundred bucks, but they break down all the time, and replacement parts are hard to find. We offer a 2-year warranty on all our pumps, and I’ll talk you through any issue over the phone at 2 a.m. if you need it— that’s the kind of support you won’t get from a random online supplier.
Now, let’s be real— is a mortar pump for everyone? If you’re plastering a small bathroom wall by yourself, maybe a trowel is fine. But if you’re doing a full house, a commercial building, or even a big patio, the time and labor savings are insane. I’ve had a contractor tell me he cut his plastering time for a 2,000-square-foot house from 3 days to 8 hours. Another told me he stopped having to hire two extra guys just to haul mortar, saving him $500 a day in labor. That’s not even counting the material waste— a lot of people waste mortar when they pour it by hand, but a pump lets you direct every bit exactly where it needs to go.
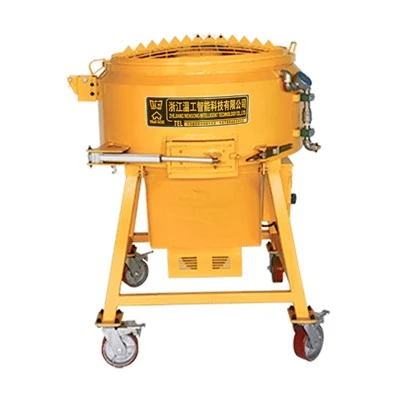
But I won’t lie to you— there’s a learning curve. You won’t nail it on your first try. I recommend practicing on a scrap wall or a small section of the house no one cares about before you do the main walls. Mess up a small area, and you won’t lose time or material. That’s how most guys figure it out— no one’s a pro the first time.
What Now?
Mortar Grouting Pump If you’re still on the fence, shoot me a message to chat. I don’t pressure anyone into buying— I’ve helped small contractors pick the right size pump for their needs, even if it’s not the one we sell. A lot of people come to us thinking they need a huge industrial pump, but a compact 110V model works for 90% of residential jobs, and that’s way cheaper. If you’re ready to stop sweating through your shirt during plastering, save on labor, and get better, more even results, we can walk you through setup, training, and even connect you with local contractors who use our pumps every day. No hard sell, no fine print— just honest advice from someone who’s been in the construction game long enough to know what works.
References
- Smith, J. (2021). Modern Plastering Techniques for Residential Construction. Construction Press.
- Lopez, M. (2022). Equipment Optimization for Small-to-Medium Contractor Jobs. Journal of Construction Tools & Methods.
- National Association of Home Builders. (2023). Labor-Saving Tools for Residential Renovations. NAHB Practical Guide Series.
Zhejiang Wengong Intelligent Technology Co., Ltd.
Zhejiang Wengong Intelligent Technology Co., Ltd. is one of the most professional mortar pump manufacturers and suppliers in China. With abundant experience, we warmly welcome you to buy durable mortar pump made in China here and get quotation from our factory. Quality products and reasonable price are available.
Address: No.111 Huakang Road, Liuao Village, Qiaoxia Town, Yongjia County, Wenzhou City, Zhejiang Province, China
E-mail: sales007@cngcjx.com
WebSite: https://www.wallgoe.com/
