Hey there, it’s Jake from your go-to control valve supplier – you know, the one that’s actually on your side when a valve fails out of nowhere and throws your whole process off. If you’re reading this, you’ve probably dealt with that headache: a control valve that conks out way before it should, costing you unplanned downtime, extra repair cash, and even mad production deadlines. I get it – we’ve been in the game long enough to know that half the time, valves die early not because they’re junk, but because people aren’t treating them right. Today, I’m gonna pull back the curtain on the real, actionable stuff we tell our regular clients to get years of life out of their valves – no fancy jargon, just straight talk. Control Valve
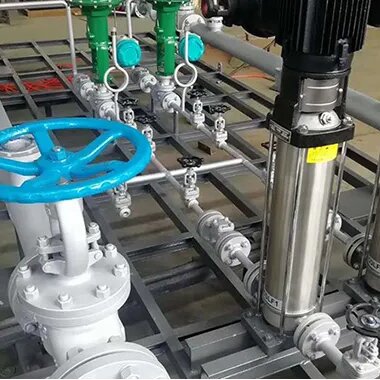
First off, let’s cut to the chase: control valves aren’t set-it-and-forget-it gadgets. I see so many operations treat them like background equipment, only checking ’em when something breaks. That’s a mistake. Let’s start with the basics that almost everyone skips right out the gate – proper installation. Yeah, I know, “installation’s just bolting it on, right?” Nah, not even close. Last quarter, a food processing plant called us panicking because their brand-new globe valve started leaking steam like a sieve two weeks in. Turned out their maintenance crew installed it at a slight downward angle, so condensate kept pooling at the seat, corroding it before the valve even ran a full month. Valve orientation matters more than you think. For most general service valves, you want the actuator above the valve body – that way, if there’s any line leaks or drips, they don’t drip down into the actuator guts and gum up the seals. Also, don’t skip the pipe supports right at the valve flanges. When the pipe above or below is sagging, it pulls on the valve body, warping the trim and making the stem stick. That’s not the valve’s fault – that’s shoddy setup.
Next up, matching the valve to the actual process. This is where I see the most avoidable early failures. A lot of shops buy a generic valve because it’s cheap or “works for most jobs” – but if your process is pumping abrasive sand slurry at 100 GPM, a standard stainless steel valve isn’t gonna last 6 months. We had a mining client do exactly that a year back – they grabbed a stock control valve for a water line, dropped it into their tailings slurry line, and it was toast in 3 weeks. We swapped it for a hard chrome-plated rotary valve with a special liner for abrasives, and it’s still going strong 18 months later. The key here? Do your math on the Cv correctly. Cv is just the flow capacity number – if you size the valve too big, it’s gonna cycle open and closed super fast, slamming the seat every time, which wears it out in no time. Too small, and it’s always wide open or fighting pressure, straining the actuator. Our team doesn’t just send you a valve – we walk through your flow rates, pressure drops, media type, and even the temperature swings to pick something that fits like a glove, not a band-aid.
Once it’s installed, you can’t just leave it sitting. Preventive maintenance isn’t the stuffy, 20-page manual stuff – it’s simple, regular checks that take 10 minutes a week, max. Let’s keep it real: what actually works? First, listen to the valve when it’s running. If you hear squeaking, grinding, or clicking that wasn’t there before, that’s a red flag. It could be the stem is dry, or the trim’s wearing. Next, do a quick visual check: look for leaks around the flanges, actuator ports, or stem packing. A tiny leak now turns into a big problem later. And every 3 months – don’t wait 6 months – pull the valve out just enough to do a stem test: move it up and down by hand. If it sticks or feels uneven, that’s debris in the bonnet or a seal going bad. Don’t wait for it to fail mid-shift to check this. Also, take the time to flush the line around the valve every few months – especially if you’re dealing with dirty media like wastewater or chemicals that leave deposits. Clogged ports or lines make the valve work harder than it needs to, wearing parts fast.
Then there’s the stem packing – that’s the stuff around the stem that stops leaks. People either overtighten it (which cuts the stem’s life short by rubbing it raw) or under-tighten it (leading to leaks). A lot of old-school crews use a torque wrench, but we’ve found a simpler trick: when tightening the packing gland nuts, snug them up, then turn them just ⅛ of a turn more. That’s it. No need to crank ’em like you’re tightening a car’s lug nuts. For high-temperature applications, use graphite packing instead of PTFE – PTFE breaks down in heat over time, leading to leaks. For abrasive media, a braided Kevlar packing holds up way better than standard cotton or rubber. We show every client how to adjust packing right at install so they don’t mess it up later.
Wait, let’s talk about one of the big silent killers: corrosion. It sneaks up on you, especially if you’re working with chemicals, steam, or even outdoor valves in humid climates. I’ve seen carbon steel valves look fine on the outside, but the inside is eaten through so bad the valve won’t hold pressure. The fix? Coatings and material selection. If you’re dealing with corrosive fluids, don’t get carbon steel – go for 316 stainless, Hastelloy, or even Duplex alloy if it’s really harsh. And for outdoor valves, use a protective paint or epoxy coating rated for your climate – salt air near the coast is way different than dry desert heat. Also, drain any trapped condensate from the valve body regularly – standing water inside is like a rust party waiting to happen. Last year, a chemical plant saved themselves $10k in repairs just by adding a small drain port to their steam valves, so they could bleed out condensate every shift.
Oh, and don’t sleep on the actuator. So many people focus on the valve body and forget the actuator is the brain that moves the valve. If the actuator is under-sized, it can’t apply enough force to open or close the valve fully, leading to wear on the trim and seat. We size actuators based on the pressure, valve type, and process load – not just “what’s cheap.” Also, keep the actuator clean. Dirt, dust, and debris get into the gears or air lines (if it’s a pneumatic actuator) and make it work harder. Every month, blow out air lines, wipe down the actuator, and grease the gears as per the manufacturer’s specs – don’t over-grease, that just traps dirt. If you have an electric actuator, check the wiring connections quarterly – loose wires lead to erratic movement that wears the stem fast.
Let’s be real, sometimes even with all this, stuff goes wrong. So what do you do when you notice a problem early? Address it fast. If you see a tiny leak, don’t put it off until next month – adjust the packing that week. If the valve is sticking, pull it apart and check for debris, don’t just crank the actuator harder. A small fix now is way cheaper than a full valve replacement later. We also offer 24/7 support for our clients – no waiting 3 days for a tech call. If you’re panicking at 2 a.m. because your valve is leaking, shoot us a message and we’ll walk you through a quick check or send a service tech same-day.
Wait, one more thing: training. I can’t tell you how many times we go to a plant and the maintenance crew has no clue how their valves work. We give free training to every client that buys from us – not a boring classroom thing, but hands-on: how to adjust packing, how to do a basic leak test, how to spot a worn trim before it breaks. Last year, a small refinery told us their maintenance team cut their valve repair costs by 40% just after that 2-hour training. They stopped guessing and started doing the right checks every week. That’s free money in their pocket.

Let’s circle back to the start: control valve life isn’t a lottery. The average valve should last 5 to 10 years, if you treat it right – not 1 or 2 years because of cheap parts or lazy maintenance. It all starts with picking the right valve for your job, installing it correctly, doing small regular checks, and fixing issues fast. If you’re tired of valves dying before their time, wasting your cash and your time, let’s talk. We don’t just sell valves – we help you keep ’em running for years. Whether you need to upgrade your existing bad valves, get new ones sized right, or set up a maintenance routine that actually works, hit us up. No sales pitch, no hidden fees, just straight help.
Control Valve References:
- Control Valve Handbook, 5th Edition, ISA (International Society of Automation)
- Guidelines for Control Valve Installation & Maintenance, Energy Institute
- Abrasion and Corrosion Resistance of Control Valve Trim, American Water Works Association
- Preventive Maintenance Best Practices for Industrial Valves, Plant Engineering Magazine
Hangzhou Meiya Power Generating Equipments Co., Ltd
We’re professional control valve manufacturers and suppliers in China, specialized in providing the best custom service. We warmly welcome you to buy high quality control valve at competitive price from our factory.
Address: Room 1418 ,Metrology Building, Xihu District,Hangzhou
E-mail: hzmysales@chinamy-power.com
WebSite: https://www.hzmy-power.com/
